Jun 29, 2012

Smart kitchen upgrades.

Tired of the old kitchen? Need to sell your home?  Here are 5 upgrades for a budget conscious upgrade:


1. Create a glass-fronted cabinet. Remove the panels in a pair of 
cabinets that is visible when you first look inside the room. It will make the space feel more open.


2. Add under cabinet lighting.  Many older kitchens don't have recessed fixtures or even lighting for the counters.  A $20 fixture at a home improvement store will have a huge impact on lighting.


3. Paint the cabinets. Dated but solid wood cabinets can look new with a coat of paint.  Don't want to do a whole kitchen? Do just the uppers and leave the lower cabinets the original color.


4. Add a backsplash or change yours out. Go from drywall to an easy to install mosaic.  Take off the old 4" x 4" ceramic and install beadboard. Small budget, big impact.


5. Get new hardware. Remove knobs and add pulls for a new look. Change the style and finish. These went from wooden knobs to cup pulls and an interesting handle to transform the kitchen.

Jun 28, 2012

Painting problems - resolved!


If you are a do-it yourself painter, you may come across one of these paint problems -especially on exterior surfaces - and need to understand why it happened and how to deal with it.  


1) Alligatoring - Patterned crackling that looks like alligator skin. It means that the top coat of paint didn't bond to a smooth finish most often caused by applying a top coat over a primer or existing paint that was not the same (oil over latex) or that was still wet. If you apply too much paint per coat, this can happen. Natural aging in  extreme climates will also cause this to happen. You MUST scrape or sand to the base surface to overcome the problem. Once the surface is clean and dust-free use a primer and then paint that are meant to work together.


2) Blistering - Lifting of paint from surface in bubbles. Most often caused by painting in sunlight or on a surface that is too hot. Fresh paint exposed to moisture will also blister, as will paint on moist walls (showers, kitchens, laundry). First determine how it occurred  (a)if only the newest paint coat is blistered, it was caused by heat or (b)  if many layers of paint are affected and the base surface shows through than it was caused by moisture. For heat blisters, scrape or sand to the next coat or primer. Re-paint and be sure the surface does not get hot. For moisture blisters, scrape to the base surface, prime and then paint. Resolve the issue by adding ventilation fans and/or caulking appropriately.


3) Chalking- Formation of a fine powder on the surface of paint. All paints do chalk somewhat but severe chalking is caused by low quality paint, over thinning paint or spreading it too thin and not sealing or priming a porous surface.  To repair the problem you need to remove chalk by pressure washing or hand scrubbing. A wire brush or sanding may be needed in some cases. Once clean, if there is no more chalking, and the paint is in good shape, you can paint over it. If moderate chalk remains you should use a penetrating additive to the first coat of water-based paint to help it bond to the surface. If a lot of chalk remains, use an alkyd-based primer and then a high quality top coat.


4) Cracking and flaking - Hairline cracks and paint chips falling from the surface. Generally caused by thinning of paint or spreading it too thin. Unprimed wood surfaces crack easily. If you have painted in windy conditions, the paint may have dried to fast and not bonded to the surface, causing cracks. When painting over many layers of paint, cracking can occur when the older, lower layers lose flexibility and give out with temperature changes. For surface cracks, scrape, sand and re-paint. When cracking is down to the base surface you need to remove all paint and re-prime before using a high quality paint.


5) Peeling - loss of adhesion to the base surface. On wood surfaces, this occurs when wet wood expands and contracts causing the paint to roll at the edges. On metal surfaces it is likely improper surface prep and failure to prime or sand. For wood, you should determine the cause of moisture (water running down from a leaky roof,  ground moisture from irrigation or seeping up, too much exposure to moist air)and repair before repainting.  Scraping or sanding the loose paint is first, letting the surface dry thoroughly, then using a primer made for that surface. Use a high quality latex paint in two coats, to cover the primed surface.


6) Poor hiding - you can see the underlying surface through your paint. Generally caused by over thinning or overspreading paint, using a low quality paint, and not using poor quality rollers and brushes that don't apply paint well.  By using another coat of un-thinned paint, you can resolve this.  A roller with the correct nap for the surface will help the paint flow on smoothly.


7) Mildew - mold growing on the paint surface. Causes can be failure to prime bare wood surfaces, painting over existing mold, or excessive humidity and moisture problems. Ventilation fans and dehumidifiers can help resolve interior moisture issues. To be sure its a mildew problem, apply a few drops of bleach to the surface. If it bleaches out..it is likely mildew since stains and dirt will not be affected. Clean the surface with a mildew remover or a mixture of 1 quart liquid bleach + 3 quarts warm water + 1/4 c ammonia free liquid dishwasher detergent. Rinse thoroughly. Allow the surface to dry and prime and then paint. You can purchase paints with mildecides or add one to the primer coat if desired. 


8) Efflorescence - White deposits on masonry surfaces. The cause is often failure to remove previous salt deposits and painting before masonry (stucco, concrete, etc..) is fully cured. Removing the efflorescence with a stiff brush or power washer is first. Wash the surface with one part phosphoric acid + seven parts of water adding the ACID TO THE WATER.  Rinse and allow to dry, repeating until all efflorescence is gone. Seal the surface with a primer designed to hold back efflorescence and paint with a high quality acrylic finish.

Jun 27, 2012

Add color to your kitchen.

When you like a neutral background in your kitchen, here are some ways to add back color, that you can change  more easily than undergoing a remodel.
Bold Backsplash
Color on the ceiling
Cabinet doors with insets
like chalkboards
A pattern on the floor
Decorative lighting
Multi-colored cabinets

Jun 26, 2012

An outdoor room dissected.


Summer is a great time to set up an outdoor room. You can throw open the doors to your home and enjoy an additional space for 2-3 months. Let's take a look at this home and patio to see why it works so well.


1. Color: The white interior woodwork - paneling and banquet seating - is painted in a satin white. With the exterior of the home and the wood trellis painted in the same color, the rooms become extensions of one another.


2. Furnishings: A similar style seating is used in the interior family room and the outdoor patio. Both the chair style and the colors in the cushions, reflect a carefully thought connection between the two spaces.  Yes, the outdoor chairs are teak and not cherry, and the fabric is a textured Sunbrella and not chenille, but the overall style and feel is similar. The black iron tables are the same as those indoors. Arranging the seating in a comfortable grouping makes the patio inviting. 


3. Lighting: To fully enjoy the outdoors at night, lighting is essential.  Here, a trellis supports a candelabra with a hurricane holding a candle on the table.  Additional lighting is provided by wall sconces that turn on automatically at dusk, and light from the family room shines through the open doors. Perfect for outdoor entertaining.


4. Soft upholstery: Pillows are an easy way to join the two spaces. The yellow fabric used indoors is repeated in Sunbrella fabric outdoors. Throws are rolled up on the lounge chairs to cover up on a chilly summer evening. 


5. Flooring: From an indoor wood surface to an outdoor large-format stone, the style of the floor carries well throughout.  

Jun 25, 2012

COLOR IT YOURS

We love white cabinets for the diversity of styles that you can create. In a casual kitchen, pairing green walls and accents is fresh, fun, and airy. Stainless appliances and cup pulls blend beautifully and the black granite counters  add the finishing touch.  Colors by Benjamin Moore.


Cabinets & Trim: Simply White 2143-70 satin 
Walls: Apple Green 2026-40 matte
Ceiling: Super White
Backsplash: 3 x 6 ceramic subway tile - white
Floor: Reclaimed Oak 

Jun 24, 2012

Kitchen.....5 ideas for decor and style.

The kitchen is considered the heart of the home.  Even if one doesn't cook, it becomes a gathering place.  Since it's such an oft-viewed space, it needs to reflect the personality of the occupant and still be functional for cooking. Hence, adding too many display items can look cluttered.  So, how do you create style for this space? Here's how.

1. Decorative backsplash:  The simplest way to add character and style is with a backsplash.  From stone, to glass, to porcelain, to wood, and unique materials like cork and metal, there is an idea for every style.  The great news is that even a small space backsplash will provide maximum impact, and is easy to modify when your style changes.  


2. Hardware:  Knobs and pulls are available in many finishes and materials, and can easily be the only accent needed in a kitchen. From sleek stainless pulls to decorative glass knobs, the selections are nearly endless.  Imagine a country kitchen with white cabinets and a beadboard backsplash; a brass knob that accents the light fixtures is a perfect, traditional choice.

3. Color: A fabulous hue on the walls or inside glass-fronted cabinets, adds style and interest. Love color? Use it on the cabinets for a custom design statement. Whether it's a country kitchen in a distressed violet stain, or a sleek minimalist one with yellow thermofoil, the personality of the user is clear.

4. Area rug:  While this is not yet common practice since small rugs can be slippery (be sure to use a rug pad regardless of size) and they can soil if food and liquids are spilled, they add personality in a big way.  A decorative Persian runner will dress up a casual kitchen and an inexpensive sisal will provide a beach look. Good news...outdoor rugs and those 'washable' just for kitchens are easy to clean and stain resistant; they come in many styles and patterns.  We love FLOR carpet tiles since you can customize the flooring and can recycle and replace heavily damaged tile.

.

5. Change the lighting:  From recessed fixtures to pendants and chandeliers, the right light fixture will create instant ambiance.  You can select a fixture that compliments your decor or add one that becomes an artistic feature.  In the top image, the lighting is glass and iron to complement the bold black and white floor. In the lower one, no dropped fixture are used since the ceiling is low and there is enough detail in the cabinet moldings.

Jun 22, 2012

5 ways to update your bedroom.

Bedrooms are unique spaces.  While we often spend as much as 1/3 of our 24 hours there, it's with our eyes closed. Yet, when awakening, your surroundings can set the tone for your day. Here are some ideas to update your bedroom. 


1. Add color to the ceiling. A great way to start your day. Even white with a hint of blue or green is interesting.

      2. Install built-ins above and next to the bed are great for small spaces. Store books and alarm clocks on shelves without taking up precious floor space. These displays also create instant artwork.

      3. Paint a single wall an accent color for interest.  


      4. Drape fabric from rods at the head of the bed for an elegant and cozy space.

      5. Use your window as the focal point, centering the bed against theA bank of windows creates a natural "headboard"and the light window treatments give the illusion of a canopy.


Jun 21, 2012

Small space ideas.

You probably hear many ideas on making small spaces seem larger. With a specialty in small home remodels, I have applied many creative solutions with success. Here are my top ways to visually enlarge a small space, whether it's an apartment, home, condo, or a dorm room.  Have fun!


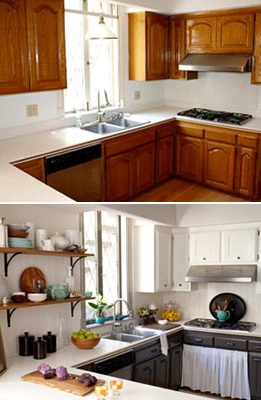
Minimal accessories keep a small
space uncluttered and open.
Use fewer colors and patterns. When your eye travels around a room it defines the boundaries of that space. If the backdrop of a space - walls, floor, ceiling - are similar in color to the contents - sofas, tables, chairs - your eye won't see strong boundaries and perceive the space as open. Pattern tends to make spaces look busy, which in turn makes them seem crowded; open your space with simple designs. 

Open windows and glass cabinets
help keep this tiny dining room open.
Don't cover the windows. Since you look beyond the space to the outside, which can visually expand that space, try one of these methods. First, leave them without any treatments at all. Using decorative window films creates privacy with no loss of light. Second is to match the treatment to the wall color to eliminate strong visual boundaries.  

A pale blue scheme makes a 
small space seem larger.
Keep furnishings small in scale and don't use skirts on seating pieces. When the floor space seems open, so does the room. So, rather than purchasing an 8' sofa for a small living room, opt for the 6' loveseat.  As for skirts, when you can see walls and flooring under and around a chair, it helps contribute to the room's airiness.

Be minimalist with accessories. When rooms are packed with decorative items, it makes them feel crowded. If you have many collectibles, group them together in a curio, bookshelf or console.

Pick pieces that have dual duty. A daybed that looks like a sofa, but is also used as a bed, will eliminate one piece of furniture. The same applies to a desk-table, ottoman-table-storage, and many more ideas.

A glass wall makes a tiny condo
seem larger
.
Use glass and mirrors.  Mirrors that reflect light from windows do make spaces seem larger. Using glass tabletops adds shine and keeps the sense of airiness that large spaces have.

Pull furniture off the walls.  When a pieces 'float in a space, you see more space beyond and perceive the room they're in to be larger.

Small windows look taller
with high top treatments.


Use horizontal or vertical lines to help.  In a low ceiling room, having tall, vertical lines - like an armoire or poster bed - will draw the eye upward. In narrow rooms, stripes on the walls, with paint, wall-coverings, paneling and even art, will make the space appear higher. Install window treatment above and to the sides of windows.  Taller and wider treatments -valences, side panels and swags - help make the windows, therefore the space,  seem larger.

Jun 20, 2012

Mirror Mirror.....


Using mirrors is one of the easiest ways to change a space. From simple reflectance, to the 
accentuation of light, to changing the apparent space of a room, mirrors can make or break a space...
no pun intended. They can serve as a wall treatment, a decorative accent, and even the cladding for 
furniture.  Framed or unframed, mirrors can visually expand or reduce the space in a room.   
Consider a small dark room. Hanging a wall mirror to capture light from a 
window, doorway or floor lamp can  visually increase the space. On the other hand, when 
used in a small bathroom reflecting a unattractive wall filled with towels and shelving,
the space can seem cluttered and small.  Here are some tips for mirror placement.


Place tall, narrow mirrors along a hallway to make it seem wider. Add sconces between or inset into the mirror for double the light. You don't need to have all of the mirrors be the same.  Using old mirrors in different frames, some hung over wall shelves, will create interest and a bit of provenance for your home.


Use mirrors as the backsplash for a small kitchen, a server, a wet bar and more to visually expand the space. Add under cabinet lighting. Consider a mirror with a design, antiquing and other details so you capture more than just reflection.


Behind a bed, a mirror can open a small room, serve as a headboard and also a dressing mirror. 


An over-sized mirror on the floor or wall can fill an empty corner or reflect a beautiful furniture vignette. The mirror can be panels, cut in diamond shapes for interest, etched, antiqued and distressed to create a unique feature.


Jun 19, 2012

Updates for summer!


Check out these easy ideas that don't require a major shopping trip.  Seasonal changes give you a fresh outlook and even a different appearance. 


1. Pare down. First pick up the area rug. For a lighter, summery feel,
    roll up your area rug and expose the floor.  Simplify your decor and remove heavy looking objects. Use fewer pillows on sofas and chairs, lighten up the number of objects displayed on your table tops.  A bonus, less dusting  when you throw open your windows and doors!

2. Swap your tables.  Instead of using large cocktail or coffee tables 
in the living room, try end tables instead. You often gain floor space, 
can place them at the point of use better, and reduce the heavy
 feel of large pieces in the center of a room.

3. Update your lampshades.  A new white shade can make a big difference in a room and to the fixture. If you're handy, update your existing lampshades with fabric, trims, paint, and stencils.
 With a small budget, you can purchase plain drum shades and decorate for the season, and even update them again for fall and winter. 
4. Bring wicker in.  Really emphasize the season by placing
 some of your outdoor pieces inside.  Try an iron side table by 
the sofa, a comfy wicker rocker in the family room. I recommended 
that my client spray her dated brown wicker furniture, and do a 
bit of antiquing;  now it's perfect year-round inside.
5. Swap knobs or paint. Instead of the brass knobs, replace dresser, 
cabinet and other hardware with something new. Big box stores,
 second-hand shops, and even Target, sell inexpensive sets of great looking hardware for fast and inexpensive updates.  My single most inexpensive, easy to execute,  and update to furniture is paint.  With a new color, nearly ANY surface can be transformed. Not artistic? Use stencils!.

Jun 17, 2012

10 organizing ideas that re-purpose what you have!

My clients often have things that they stop using for the intended purpose, and they get stacked in a closet, the garage, or just clutter their rooms.  Here are a few items and some new uses!  Hope it helps!


1) Toothbrush holder: With electric toothbrushes being stored in cases, these counter models are often antiquated items. Use it to house pens and pencils on a desk, the kitchen counter, or craft table.  Pretty attractive!  For the old wall-mounted ones, hang beside your desk for easy reach of scissors and more.


2) Soap dish: I use gels and liquids, so my ceramic soap dish is now a paperclip holder. My client uses hers to put in rings and earrings at night. They're pretty enough to leave out and handy to reach.


3) Paint cans: Maybe you don't have too many of these around, but a creative way to separate papers, toy parts, and more is an old, clean, paint can. New ones work too and you can have your children create designs for the outside. Make them into a candle, a gift tote, and even a planter.


4) Clothespins: I know of a few people who still love to freshen their clothes on a line, but for those who don't, the pile of clothespins can be used to hang important cards, notes, and invitations on ribbon, string or wire, in a home office.  Glue magnets to the back and - voila - a country style refrigerator magnet.  Decoupage them for a sophisticated look.


5) Cookie pan. Need a memo board?  An old cookie sheet, covered with paint, shelf paper or other decor, can be a neat catch-all for posting and saving papers. Here are two, tied together with ribbon and shoelaces.  Great use for small ribbon samples too!


6) Dish drain:  When you need a solution for files and don't want a closed tote or box, try this idea. You can slip folders in - there are some great patterned folders you can use - and create a neat, handy place to organize your paperwork.


7) Mint tins:  Altoids makes a sturdy tin, but when it's empty there isn't a refill.  Use it to store business cards you collect so they stay neat and flat.  I have a few in my desk drawer for pins, pennies, picture hangers and buttons.  If you decorate them they can be customized to what's inside!


8) Muffin tin:  This is truly a handy device for a kitchen drawer, a shop, your desk, and even a jewelry box. When they're too old to bake in - older models may even be rusted - they make a great country style organizer that looks as good as the function.


9) Shower caddy: Sometimes a bath remodel adds niches into the walls. The old caddy can be sprayed and used to store crafting items, mail, dog leashes, and so on.  Hang it behind a door to hide, or dress it up with paint, ribbon and beads for wall art. Need spice storage in your pantry? Hang it on the door or wall and load it with spices!


10) Plastic food containers: When you finish the deli salad, switch to BPA free containers, and use the last of the cream cheese, turn those containers into organizers for buttons, coins, seeds, rubber bands, and all of the things that get left in the bottom of drawers.  Dress them up or not!