Soy candles are a healthy alternative to burning fragrance-filled artificially colored candles in your home but they're expensive and hard to find. So, make your own! It's easy and fast.
 Step 1: Gather supplies
All you need to make your own soy candles are soy wax flakes, a double boiler, clean-burning wicks with anchors, a pencil, containers of your choosing, scented oils and wax paper to catch any drips or spills. Have all of your supplies ready to go, as the process of melting the wax and setting the candle moves fairly quickly.
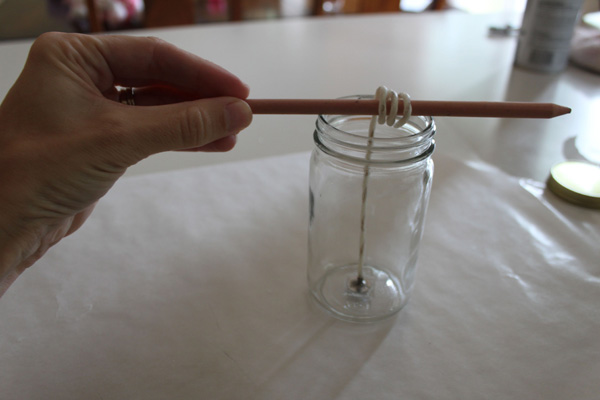
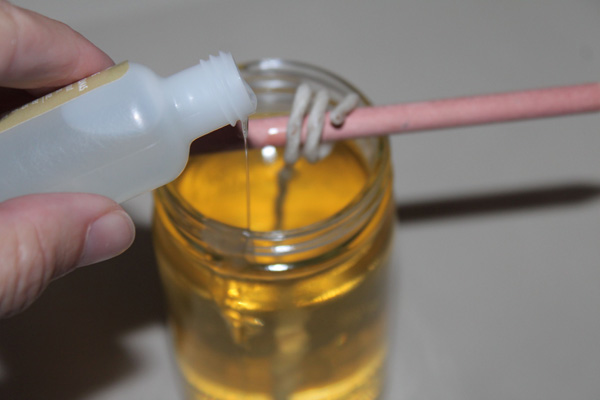
Step 2: Set your station
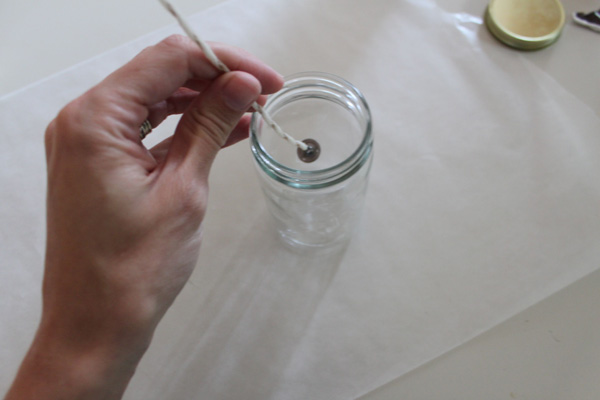
Your candle holders need to be ready before you begin melting the wax, so make sure you are fully prepared. Secure your wicks to the center of the bottom of your glasses or tins (most wick packages come with a tacky backing to secure them; otherwise use a hot glue gun or a dab of sticky tape). Once the wick is centered, hold a pencil horizontally across the top of your candle holder and wrap the wick around it until you can rest the pencil on your glass or tin. This will hold the wick in place as you pour the wax into the container.
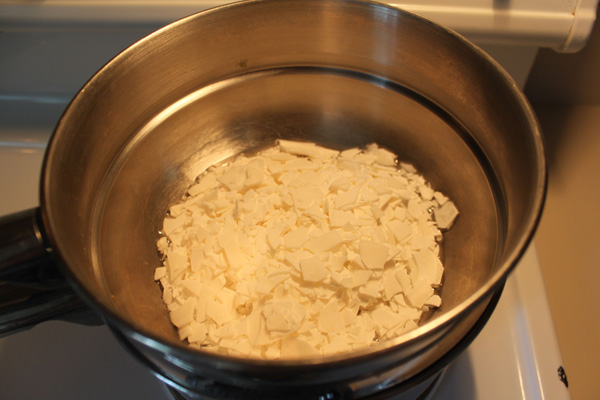
Step 3: Melt away
Get your double boiler started, boiling at a low boil, and pour twice the amount of wax flakes into the boiler as the amount of wax you need for your containers. For example, if you are filling a 2-cup glass, you will need to melt about 4 cups of wax flakes. Stir slowly until all of the flakes have melted into a liquid with no lumps. Add several drops of the scented oil you have chosen into the liquid just before removing it from heat.
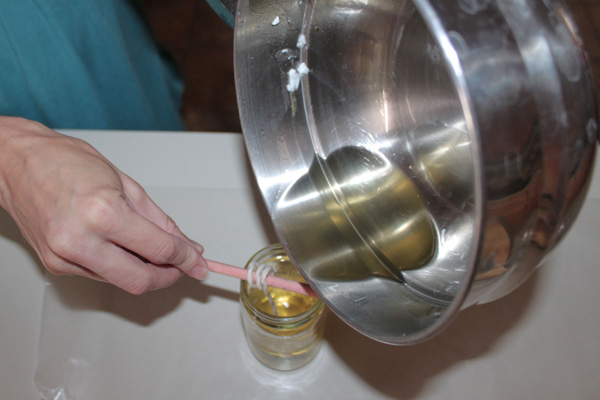 Step 4: Create your candle
Carefully pour the melted wax into your container, making sure not to move the pencil holding your wick in place. You can use a strainer if you wish, but the liquid is fairly thick, making it easy to pour and control without risk of splashing or spilling.
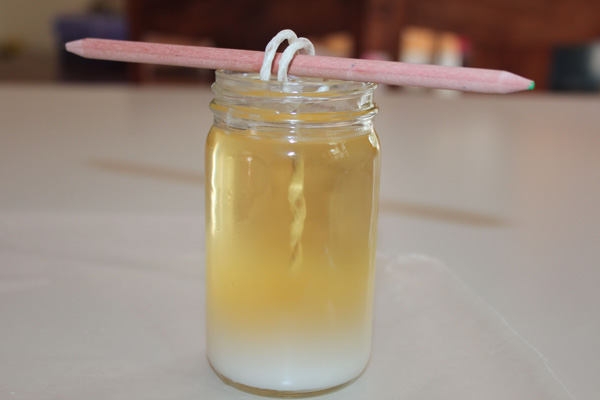 Step 5: Wait
The wax will begin hardening right away, so do not move or adjust your candle. As it begins to harden, you'll see the color lighten within the candle. Let sit for at least three hours before removing your pencil and trimming the wick. Generally you should trim the wick a quarter-inch to a half-inch above the level of your wax. To make sure the candle has set completely, let it harden overnight before burning your new creation.
Step 6: Voila, enjoy!

