Jan 31, 2011

Light up - Save Energy


With increasing energy costs, concerns about our carbon footprint, and global awareness of eco-friendly design how do you consider these elements and still have great lighting design?  In less than 10 years, incandescent light bulbs may no longer be readily available. They will be replaced by Light Emitting Diodes (LED), compact fluorescent (CFL), and other innovative lighting sources. Here are 4 ways to get better light that costs less.


An energy-saving lighting design for an historic home.
1) Swap bulbs:  The simplest way to make an immediate change is to purchase CFL's or LED bulbs and screw them into your existing light fixtures.  Both come a variety of styles from chandelier shaped bulbs with small bases, to regular "A" base incandescent bulbs (IB), to the reflector shapes found in recessed or 'can' fixtures.   They are no longer many times more expensive than IB's, and combined with their longevity - up to 10 times longer - you save time as well as money, for example a 13 watt CFL - using 104 kilowatts - gives the equivalent light produced by a 60 Watt IB - using 4X as many kilowatts.  Check out the color temperature ratings of the bulbs for cool white, warm white, or crisp blue light.

2) Add dimmers. Another easy way to save money, add ambiance, and a great look on your walls is to replace existing light switches with lighting controls. Dimmers are the simplest. These can all be retrofitted in the same space occupied by your regular switches or installed without wires at all.  Those I recommend are made by www.lutron.com, and are sold at most hardware and big box stores. When you don't need lights on full power all the time, dimming them 50% will save you 50% on costs.

3) Install sensors.  Does your family forget to turn out lights when they leave a room? Wouldn't it be great for the lights to come on when you walk into a room with an armful of groceries? Use occupancy and/or vacancy sensors and see the benefits in energy use and functional use immediately. 


4) Start with a plan. When remodeling, building or doing a major upgrade - particularly where local codes require energy savings - you can install ready-made fixtures that meet energy code in kitchen and bath design. Many well-known lighting manufacturers offer hanging and wall mounted fixtures that are designed specifically for fluorescent bulbs.  Long -term, LED's are more energy saving, longer lasting, and are available in many styles. Whether you need recessed or can fixtures, under cabinet task fixtures,wall or ceiling fixtures or puck style lights, there is a fixture that will be stylish and energy-efficient to meet your needs. Check out Lutron's room, lamp and whole home lighting systems for long-term design planning, energy efficiency and cost savings

When in doubt, contact a lighting design professional. We want you to have the right light for your rooms and tasks while saving energy!

Jan 27, 2011

Mirror, Mirror on the wall.

Once considered solely for bathroom domain, mirrors have broad use in interior design. 
From simple reflectance to the accentuation of light to changing the apparent space of a room, 
mirrors can make or break a space...no pun intended.   They can serve as a wall treatment, a 
decorative accent, and even the cladding for furniture.  One of the newest configurations 
are modular mirrors.  Whether you fit them together or space them apart for interest, 
you can use them as both art and a space enhancer.  Framed or unframed, mirrors 
can visually expand or reduce the space in a room. Consider a small dark room..
hanging a wall mirror to capture light from a window, doorway or floor lamp can 
visually increase the space. On the other hand, when used in a small bathroom 
reflecting a unattractive wall filled with towels and shelving, the space can seem 
cluttered and small.  Here are five tips for mirror placement that you can try to accentuate your decor.
Clever use of this mirror set surrounds the room with a garden view.


1) As a centerpiece, placing candles to reflect light for dining.
2) Over a small bed as both a headboard and dressing mirror.
3) An over-sized mirror on the floor to fill an empty corner or reflect a beautiful furniture vignette.
4) Along the walls of a narrow hallway to make it seem wider and brighter.
5) As a backsplash in a small kitchen to expand the space.


Jan 26, 2011

5 Favorites for February

 With another three months of cold weather and early darkness to contend with, winter is a great time to add color, light, and softness to your rooms. Take a look at these generic items and how similar ones are used in this photo. Don't forget your bath and bedroom....these items work beautifully there as well.

 
 1) Cashmere, wool or woven throw. To warm you as you read or watch TV, a bold color adds instant warmth to a room. Whether you select textured or smooth, natural fibers or acrylics, a throw (or two) at a great price will add just the right touch.


2) Blue and white. Classic in style and color, blue and white urns, vases, and other accessories add function and aesthetics to any room.  Add flowers for bold color and a touch of spring, store your remote controls, coasters and other items in a lidded urn, set a large piece by the fireplace for matches and kindling, and enjoy the results. Williams-Sonoma has a set of bath accessories in blue and in coral.

 
3) Baskets and trays. Add a wooden or woven tray to place candles, books, nick-knacks and other items on. They gather items together for a neat appearance, keep wax from spilling onto furniture, and add a great architectural element. Woven baskets are great for storage and absolutely add a spring-like feel. You can opt for a heavily textured weave for a casual appearance, or find a sleek weave for an elegant one. Bring them outdoors in summer for year-round use.

 
4) Hurricane and lantern candle holders. Available in many sizes, color and shapes, you can find the right style for you. Whether you opt for a silvered mercury - classic and elegant - or clear glass with a metal rim, you'll add safety and function to using candles.  Opt for flame less candles.  Not your style? Try a table lamp in a unique finish or shape.


5) Area rugs. The fastest way to physically and visually add warmth to a room is with an area rug. There are nearly limitless selections for every style room, with natural and man-made fibers, and machine and hand loomed options to fit your budget.  Keep the color neutral for year-round use, or add a bold color or pattern for seasonal appeal.

Jan 25, 2011

10 steps to a new kitchen.


Thinking of remodeling the kitchen?  With new technologies, new surfaces, and updated trends, your ceramic tile counters and oak cabinets may be dated for your taste. If you are like many homeowners, you wait until your appliances finally fail before updating the entire space.   Remember that a kitchen adds equity to your home or condo, so making an investment in this space is more than just refreshing the appearance; a remodel should create a more effective cooking space. It's wise to invest in a professional kitchen designer to create a solid plan. Here are ten stages to follow, so your remodel is done right.

1) Create a plan and develop a time line. This is where you define your needs. Is your existing space too small, badly arranged, and the cabinets don't hold what you have? If you require only a surface-level renovation rather than a remodel, identify what needs to be changed. Consider your short and long term cooking needs and how you and your family will use the space over time. While the classic kitchen triangle no longer works in multi-cook, multifunctional kitchens, it's a guide to developing a new space plan. The larger your project, the more important the planning stage will be. A time line from start to finish should be developed. When should you apply for a permit? When do you need to select appliances, finishes and fixtures? How long will your kitchen be out of commission? Have you considered an alternate kitchen to use during an extensive remodel? Most people hire contractors to do the work, so share your plans and time line with them.

2) Start demolition. When your plan is complete and you have a contractor, removal of what exists is the first step in your remodel - following
your plan as a guide. Be aware that kitchen materials may contain hazardous materials such as lead-based paint and asbestos and they require special handling. Consider recycling your cabinets, metal, windows and doors, porcelain and ceramic tile and drywall.  Many communities have places to donate usable items (windows, sinks, faucets and cabinets), and centers to take and recycle construction waste.

4) Construct and repair.  Depending on the new kitchen's configuration you may be moving or adding walls and windows. When the 'guts' of the old kitchen are removed, inspect studs, joists, wiring, drywall and everything that you can. With the space open, you can perform necessary repairs or updates. Shoring up a floor for a new island, raising a ceiling, and re-framing walls are done at this stage.


5) Rough-in the plumbing.  If you are changing the position of your sink, refrigerator or adding appliances including ice-makers, you will have plumbing needs. At this "rough-in" stage, new supply and drainage pipes are added for sinks and appliances. 


6) Install electrical infrastructure.  To power a modern kitchen - especially if you are adding appliances - you should have at least a 200 ampere service panel; have a professional electrician do that work.  Are you considering a smart home? A lighting control system? These systems and wires will all be installed at this stage. Even adding an appliance where none existed will require a new receptacle; be sure you know the power requirements. This is the time to update old wires, run new circuits, install ground-fault-interrupt receptacles, and change the location of lights. Consider long-term changes even if your budget does not include them now...wiring for an audio system, a new bank of lights, etc..will eliminate the need to open the drywall again.

  
7) Close the walls. When you've finished the wiring, prepare to close walls by first insulating all walls considered exterior walls. With the wall cavities accessible, now is your chance to install high-quality insulation rather than using less-effective blown-in insulation later. Be sure to have the electrical system inspected and approved by the local permitting agency. Then hang drywall, tape and fill the seams. Before you add your texture, sand the seams until smooth.  Popular textures include, orange peel, knock-down, and varying thicknesses of skip trowel.  Finally, prime and paint.

8) Install a floor. Typically the kitchen floor is laid after the heavy work to save it from wear and tear. If you are installing a wood floor, you should wait until after the cabinets are installed to protect them from damage. The age-old argument of installing tile under the cabinets can be answered now. Since you do need flooring under your dishwasher, refrigerator and range, the cost of additional materials and labor to go under all cabinets can be determined and the decision made based on your budget.  There are many flooring options, among them vinyl, tile, wood, and cork. Finished cement floors are a good option for modern style.

    9) Install cabinets and counters.  Once the base cabinets are installed and level, the countertops can be installed. Contractors typically hang upper cabinets before installing the toe kicks and base cabinets. Whether you opt for ceramic tile, granite, marble or surfaces like Vetrazzo, Corian and Caesarstone, base your choice on using and maintaining it. Natural stone counters - slab or tile - are porous and require proper sealing and care, while quartz counters are sustainable, non-porous, have antibacterial properties and the same heat resistance as granite.  

    10) It's time for fixtures, trims and appliances. With the new counters in place, your sink and faucet, cook top and other appliances are ready to be installed. Since the electrical work is done, the trims for recessed fixtures, the housings for your LED and under cabinet lights, and all of the wall and ceiling mounted lighting can be installed.

    Don't forget to add the final items - trims, receptacle covers - and create a punch list before you sign off on the finished project.

    Jan 24, 2011

    Engineered wood floors - a primer.


    Engineered plank flooring provides a number of benefits not found in solid wood flooring. First, they are real wood from the cross layering layers of hard or soft plywood - pressing the layers together at right angles - to the surface wear layer. Engineered wood floors are more resistant to higher moisture levels so are appealing in many types of installations, and their durability as a result of their construction makes them ideal for above and below grade applications. The top layer - thicker for wear - is added in the choice of species the floor will be. This entire process enables smaller pieces of lumber to be used and produces 4X more square feet of product per tree harvested than standard wood flooring, making it eco-friendly.  

    Since stability is vastly improved, engineered flooring is more durable than natural wood flooring therefore can be used in harsher environments. The final coating - urethane, aluminum oxide, etc.- provides durability and scratch resistance to the wear layer. Among the methods of installation are floating, glue-down, nail-down or stapling, and click-lock, but all require the proper layer over the sub-floor. Based on the factors above, the appeal of engineered wood flooring is that same as that of solid wood, and resale values will be the same.

    Like hardwood floors, engineered floors are made in widths from 3-7 inches wide and come in a wide variety of domestic and exotic hardwood species. Brand-to brand, the wear layer will differ, providing different ability for the wear layers to be sanded and refinished when worn. Thinner wear layer floors (2mil and under) have an average lifespan of 30 to 40 years while thicker (2-4 mil) wear layers last from 40 to100 years - like solid harwdood - before having to be replaced.

    Your concern should be to match the demands of use for your flooring to the type of floor you select. There are hardness differences between the wood species and manufacturers use a variety of sealer products on the wear layers. If the area where the flooring is to be installed will receive heavy traffic with little maintenance, then opt for an engineered floor with a thick wear layer to enable sanding and refinishing as needed.  For areas with less foot traffic and that you intent to maintain, you won't need as thick a wear layer.  

                              
    SUMMARY OF BENEFITS
    Their lifespan can be 30 - 100 years.
    Engineered wood enables you to have a wood floor on any grade level.
    Can be used on both wood subfloors or dry concrete slabs.
    Some species are well suited for humid areas.
    The floors are very easy to install.
    They are more dimensionally stable than solid wood floors.
    The availability of, sizes, colors, species and styles is nearly endless.
    Wear layer dependent, they can be sanded and refinished.
    It is the only floor covering that can increase the value of your home.
    Wood floors are a good choice for allergy sufferers.

      Jan 21, 2011

      5 commercial remodeling tips.


      An open conference area...appealing yet easy care and hygienic.
      Look closely at your office space. Many companies have working environments that are not conducive to effective work, nor to best serving their clientele.  What are the walls like? Are surfaces cold and hard? Is your floor layout difficult to navigate? Is the space able to accommodate future growth?  Considering these factors before embarking on an update or committing to a leased or purchased space is wise. As an after-thought, the cost to update may still be returned in more productivity, impress your clients, and lead to growth.

      1. Add Color.   The simplest way to make an office appealing - considering safety and health as well as cost - is to add color. Gray, pea green and white are bland colors and while easy to maintain, the lack of color doesn't contribute to a feeling of well-being.  While blazing red walls may not be appropriate for a medical office, a palette of light earth-toned hues is right.  Color guides emotions, affects stress levels, and can impart elegance, sophistication and satisfaction.  With low odor and no VOC (volatile organic compound) paints, a wall color change will have a long-term beneficial impact on your air quality. For a complete update, new textiles, accessories, and plants create a new environment without structural work.


      2. Reduce hard surfaces.  Use of hard surfaces including vinyl flooring, metal blinds, and the lack of upholstered furniture is unappealing and results in terrible acoustics. Care and safety/health are always primary considerations in selecting surfaces for commercial design. With new materials and surfaces that incorporate anti-microbial, anti bacterial, and moisture resistance, no-slip technology, and even air-purification, the reasons for using older surfaces are no longer valid. For high-impact, plants and water features are two additions that are inexpensive and easy. Depending upon your industry, when adding fabrics to windows, furniture, etc.. consider durability and flammability.

      3. Space plan your main work area well.  If your reception area is your first exposure to your client base, then it should be the focus of a well-defined space plan.  For firms who don't see clients, and its employees are key to the company, designing common areas (including break rooms, conference rooms, etc..) for comfort will enable high quality, long-term use of your office space. Whether your key area is an environment for circuit board assembly or a waiting room for patients, the planning for that space will affect the long-term stability of your business. In the former example, without considering room for assembly line modifications (as a result of technological or other changes) or appropriate and private spaces for patient greeting and triage, overall corporate health will suffer.

      4. Design your layout for work-flow.   Is your office ideal for the actual work-flow requirements?  Whether you are a law firm, a cosmetic surgery center, or have an assembly line,  you should consider the needs of your staff and clients based on peak work times so you can function optimally all the time. Generate a work-flow diagram so you can identify immediate and long-term space requirements; obtain input from staff involved in the work process. If your employees must use a common area repeatedly in their work cycle, or there is equipment that everyone shares, the placement of that area and equipment is critical to efficiency.  A quick cost-benefit analysis can also guide you as to whether a second area or additional equipment would be worth the expense.


      5. Plan for the future.  Space plans for offices are often geared towards immediate need. Thoughts on layout and infrastructure as a result of future growth are often ignored. While you cannot plan for exponential expansion, the addition of a few new employees and new equipment should be considered. Certainly investments in technology show more immediate returns, but a lack of consideration for a new client base, an expanded department, and where to put them and the furnishings and equipment they require would be remiss if near-term growth is projected.

      Jan 20, 2011

      10 tips for pillows

      Pillows are a wonderful accessory to provide color, texture,and style. Here are some ideas for use, size,  and shape. 
      1) DON'T use too many. Sitting on furniture overstuffed with pillows
      isn't comfortable and they often end up on the floor. 
      For a standard 8' sofa 3 to 4 pillows should be sufficient.

      2) DO consider changing the shape and color of the pillows from that of your base sofa cushion and fabric color. Have many pillows that came with your sofa? Add another fabric to the face of some, and add welting, trim and other details for interest.

      4) Square pillows work for many applications. For example16" squares are good corner pillows for 6-7' sofas and 18" squares work for 8' or larger sofas. 26" x 26" is a good size for floor pillows and back pillows for queen and king sized beds.  

      5) Try neck roll pillows. These are long and round - generally 8" in diameter and 16" long for lounge chairs. Bolsters in larger scale 10"in diameter and 22" wide, are great for beds. Scale the width for the chair.

      6) Kidney pillows dress up large dining chairs and the center of sofas. The chair pillow should sit just inside the width of the seat and be as high as needed for comfort when sitting in the furniture.
      Neckroll pillows are a great shape.

      7) Add detail with contrast welting, a second fabric, and appliques. How about corner or center buttons?
      One decorative pillow has more impact than 3 plain ones.

      8) Knife-edge pillows are fine but try adding flanges and welting

      9) Experiment with mixing round and square shapes together. On large sofas I like to use square corner pillows with a smaller round in front, and a large bolster in the center which also serves as a back support.

      10) Swap the color, texture and location of pillows throughout the year for interest! Bedrooms aren't often in the same color as the living areas, but if they are, swap room to room. 

      Jan 18, 2011

      5 Small space tips.

      We all want the best design solutions, especially for small spaces. Try one or more of these tips for your apartment, condo or small home.  They work well in multi-unit homes and dorms too!

      A great way to lift clutter in the kitchen.

      1.
      Get organized. Clutter can make smaller spaces feel cramped and uncomfortable. Make a plan and place for everyday items. Upgrade closets with built-in organization systems rather than just rods. Digitize music and video collections and remove the boxes from view. Add pre-made desk units, storage cabinets and items that will help hide but make work and stored items readily available. In the kitchen, add shelving and store items above the visual plane.


      2. Connect with the outdoors. On a wall with only windows to the outside, try a wall color and window coverings that appear like the outside colors and textures. If your doorway opens to a usable outdoor space, treat it to flooring and furnishings that look like your interior. Clean your windows since grime will cut down incoming light.


      Adding a raised desk keeps the floor area open.
      3 Combine spaces. Open adjoining rooms (you do not need to remove walls)  by installing glass, a built-in bookcase with an open back, or a wider pass-through. Remove doors between rooms and leave the passage open. Can you raise or lower a floor area? A loft in a bedroom or sinking a living area will create the illusion of a larger room. Good color choices are another great solution. Sharing colors in adjoining rooms can visually connect and expand them.  Send along your photos and we'll give you on-the-spot solutions for your small space challenges!


      4. Let in the light. Install windows above or below cabinets to brighten and make it feel larger. High, narrow windows let in light while maintaining privacy. Transoms on interior bedroom walls or over doorways are great to bring light into rooms. Change window coverings to open weave blinds and fabrics and keep the colors lighter.  Translucence adds privacy but allows light in. Install fabric panels beyond the window frame to make the window look larger.  Can't add windows, try adding 'light boxes', up-light cans behind furniture and plants, and rope type strips under shelves, cabinets and moldings. 
      Sheers  at the window bathe this apartment in light.


      5. Change the arrangement of furniture. Pieces set away from - in lieu of lining - the walls, does make spaces appear larger. Remove pieces that are not useful. If needed, add TALL pieces to bring the eye up.


      Jan 17, 2011

      5 features for your remodel

      Here are five features to consider adding if you are remodeling or selling a home in 2011.


      1) Energy-efficiency. This includes appliances, high-efficiency insulation, and high window efficiency. The use of recycled materials will not be demanded until later in this decade, however, home lighting systems, sustainable surfaces and Water Sense fixtures will be must-haves by 2016.


      2) Home office/study. People would much rather have this space than a formal dining room.

      3) Luxury kitchens. Hidden appliances, craft centers, and other personalized areas are must-haves. Islands are still in demand and granite is the top choice in luxury counter tops.

       
      4) Outdoor living rooms. Extend indoor spaces to the outside and furnish them for daily use. Consider adding an outdoor kitchen or shower.

      5) Over-sized showers. Larger showers with two types of shower heads are considered transgenerational which adds to the appeal of a home. Add a seating area and shore up the walls for decorative grab bars, particularly if the clients will be aging in place.

      Jan 16, 2011

      Tips to reduce clutter

      We all have 'things' that we need on a weekly - often daily - basis. They're functional but oh so unattractive.  How to hide them is always a creative challenge. Try these tips.

      1. Charging station: For phone chargers and I-pods and the like.  Most console tables and nightstands have power outlets behind them. If they have a drawer, drill a hole in the thin back, mount a power strip inside the drawer, and run the cord through the hole to the power outlet. Plug in your devices, close the drawer and everything's out of sight. Some devices produce heat, so beware, but often only need 2 hours to fully charge. Of course, you can buy this item as well....

      2. Mail storage: Whether it's in an office or left in another room, this 'clutter' element is much-needed and out of sight can often lead to forgetfulness.  A simple habit of always placing it in the same location will help you determine whether the storage is a simple decorative folder, an attractive letter sorter, or a closed box.

      3. Keys, wallets and change:  Your partner come home from work, his pockets are full...after unloading keys, change, a money clip and other paraphernalia, there is a pile of stuff in the kitchen, entry...somewhere. Hiding in a drawer is a reasonable idea, but a more practical solution is a small box or flat canister that works with your decor and is easy to access; on the kitchen table, on the counter, in the entry, or by the bedside.
      4. Toilet paper:  One of the simplest and aesthetically pleasing storage solutions, for those small baths without room for a cabinet, is a lidded box sitting along the toilet tank. Where possible, a great wall-mounted cabinet will hide many rolls, cleaning supplies and hand towels. If you don't have a tank, add a small glass shelf and then your pretty storage box or basket.


      5. Laundry:  Some homes have a laundry room that hides baskets and sorting. If you don't have a dedicated space, try something other than a wicker hamper...how about making an old dresser into a laundry hamper by joining the drawers together and creating ONE deep one?  This takes a bit of doing, but if you can update and re-purpose that old dresser it can serve as a great hallway piece...add a lamp and art...voila.


      6. Toys:  A great idea for toys is a dual function ottoman/storage cube. They are inexpensive ($50-100), come in squares and rectangles, the cover is light enough for most 5 year old's to lift, and they can be used as seating also.


      Jan 15, 2011

      Kitchen Trends

      Here are 4 trends for kitchens which are derived from the overall vision of interior trends for 2011.  I have noted that it's hard to follow home trends because it can be time consuming and costly and they may not accurately reflect who you are.  However, by incorporating some of the top trends, you can be cutting edge with products and technology and stay true to your budget and  personal style!

      Handmade tiles and pendants, a Lutron lighting system, hidden appliances & 'green' finishes customize this kitchen.


      1) Personalize and make it unique. As kitchens have moved from being separate spaces in our homes, to open spaces adjoining 'great rooms', and often a space for multi-tasking, the function and aesthetic must be customized to the user(s).  From the footprint, to specialty appliance selection, to the finishes used, your lifestyle should be reflected in your kitchen. Rather than being a strictly utilitarian space, a kitchen should incorporate your personal style and preferences. If you are a crafter, your island may serve as a dual-function storage/use space. Love Asian design? Incorporate that style with appropriate materials, scale and layout.

      2) Handcrafted is desired.   Show the brush strokes on your hand-painted cabinetry, use honed stone in lieu of polished. Add your travel collectibles in place of dish displays.

      3) Focus on healthy and green. Use of eco-sensitive products is on the rise with improved availability at more affordable price points.  From flooring, to finishes, to lighting and appliances, installing green products can positively affect the long-term health of your family and home. With no-to-low off-gassing from finishes for walls, cabinets and floors, more efficient energy consumption through improved appliance and lighting performance, anti-bacterial surface treatments, you can expect better overall air quality, lower energy bills and a beautiful aesthetic. 

      4) Use technology to your advantage.  By incorporating lighting control, you gain function, improved aesthetics, and better energy conservation.  Incorporating new appliances into cabinetry helps maintain continuity with adjoining spaces. Improved panel displays, wireless technology and other innovative solutions will make your kitchen state of the art today and work as you grow older.

      Jan 14, 2011

      Pet friendly spaces - 10 tips.


      We love our pets, but letting the house 'go to the dogs' (and cats) isn't practical.  Here are ten tips to create a space that you and your pet can enjoy.

      1) Add a throw.  Like my pets, yours may love the sofa, easy chair or bed, but shedding makes it difficult to keep clean.  Use an acrylic or polyester throw whose fibers capture hair quite well, and usually wash out. Better on that throw than your best suit! For beds, you can add an extra decorative sheet or duvet that's easy to wash. Dining chairs can be covered with cloth napkins and look great as well as serve as protection for your fabrics.

      2) Vacuum it up. Purchase an easily handled vacuum and use it faithfully at least twice a week. You will reduce the amount of oil and odor that shedding hairs leave behind. I have a small hand-held that slips behind the sofa..plugged in at-the-ready. 

      3) Go hard.  On the floors that is...Thick pile carpet is nice but captures hair, bacteria and odor. Wet stains are nearly impossible to remove. If you love carpet, try a berber or other low pile product. Be sure you use an anti-microbial, moisture resistant pad for long-term durability and best results. Porcelain or ceramic tile is an ideal flooring (See details in previous blogs) and with the variety in style and color, and easy care, make it practical and beautiful. Hardwood floors are good if the right floor is selected...soft woods do scratch and claws can often leave gouges.

      4) Switch fabrics. I love silk and wool but they are not pet-friendly. With body oils and nails, there is often enough damage from one 'leap' to cause me to want to re-cover.  Crypton has some fabulous colors and patterns and the fabric is stain, soil and bacteria resistant. Ultrasuede takes the place of velvet quite nicely.

      5) Use pads. Under your mattress cover, you should add a waterproof pad so the inevitable accident doesn't ruin the mattress. Have a featherbed?  First use a waterproof zip-on cover, then soften that with a nice cotton or bamboo one.

      6) Groom and bathe.  Trimming dog and cat claws will help your floors and upholstery. If you brush pets regularly, less hair will end up everywhere else.  Some dogs hate baths, but it's easier than removing stains from your sofa.


      7) Make special spaces.  Cats love to perch and climb, dogs like dens. If you don't like the look of ready-made climbing trees, window perches, or dog crates, incorporate them into your design.  MDF cat perches painted your trim color are great to add to walls (yes walls!), windowsills, and even bookshelves. Create a space for dog beds and crates under window seats, in cabinetry, and under tables.


      8) Create barriers.  This refers to a literal barrier to prohibit pets from using certain areas in your home.There are some beautiful wooden fences at Frontgate, and may be perfect for puppies and kittens. Create a barrier between the litter box and the floor with boot trays that capture litter and make it easy to pull out and clean the boxes. Some cats don't like enclosed boxes...but that's another option.


      9) Match it!  When selecting fabrics, pillows, flooring, etc....try to select colors that work with your pet.  A white marble floor for a black lab isn't practical so try a deep taupe tile or ebony bamboo flooring! You get the idea.


      10) Aim for practical.  It's not easy to rush around grabbing paper towels and cleaners when the dog throws up. Try to keep a stash of cleaning products in easy reach of most rooms. A lidded wicker box that also stores shoes is great for hallways, near entry doors, and even in the bedroom. Watch the color and treatment of the treats you give so you don't have extra cleaning. Pets love smoked bones but the natural ones don't leave marks and are healthier.

      Jan 13, 2011

      Ten tips for bath design.

      When you are planning a bath remodel, consider using one of these ten ideas to customize your design:


      1) Use glass.  Adding walls or shower enclosures of glass will open the space.Whether you use standard glass, glass blocks, an obscure glass, or custom privacy glass, the results will be fantastic.


      2) Add legs. Instead of placing cabinets on linear toe kicks, use furniture style legs. To avoid dust from gathering underneath, use that toe kick but back it off so it's not readily visible.

      3) Teak it up. Teak is a favorite material for bathrooms with its natural water resistance.  How about a teak fold-down bench?  A shower mat?  The shower floor? 

      4) Upscale.  Bathing or showering as a couple can be practical as well as romantic. Increase the size of your walk-in shower or spa tub for function and enjoyment.

      5) Think commercial.  Although many commercial fixtures are now made for residential use, products like Infinity drains, hands free faucets and auto-flush toilets are sleek and very functional. An added bonus is durability and eco-friendliness.

      Adding curves and a platform creates drama.
      6) Go curvy.  With many bathrooms being strictly linear, the addition of curves imparts softness and interest. How about a platform for the spa tub? The edges of the vanities? With more space you can design a curved shower enclosure.


      7) Buy local.  Adding to the sustainability and the beauty of your bathroom, is to use products found locally. Stone from quarries, wood harvested in the area, and other finish materials or fixtures crafted locally are more customized for you, and may add resale value later... the costs may be more competitive for local customers.

      8) Define the spaces.  Rather than set all of the fixtures and cabinets onto a uniform floor, if you have the space, delineate it with meandering tile designs leading towards each functional area.  Doing so adds artistry, accentuates cabinetry, defines functional areas (wet-dry) and even allows for more creative use of surface materials.

      9) Take it outside. With a second home that is used seasonally, try creating an outdoor shower or soak tub area in lieu of a hot tub.  Using materials designed to withstand weather changes, you can expand your home and capture the essence of the surrounding environment.

      10) Add detail. Use the architectural details of your home or the style you have created in other spaces. Use wrought iron in lieu of chrome for shower doors and decorative details on doors and walls, use quarter -sawn oak to create block legs or a platform for the tub in a Craftsman home. Have a Tuscan home? Use terracotta and colorful ceramic tiles in the shower to bring the flavor of the Italian countryside into your bath.

      Jan 12, 2011

      Orchids in interiors.


      Orchids are one of the most beautiful plants.  With a cascade of flowers on each stem and deep green leaves, they are pure in form and light in appearance. Whether you have a traditional home and plant one in blue and white porcelain or a minimalist space and use a low slung matte black planter, orchids will add to your decor.  Even if you opt for only a flowering stem in a vase, the bloom can last for months.  If you are not interested in care, but want to take advantage of their architectural beauty,  when the bloom dies, donate your plant to someone who will care for it and allow it to bloom again and again.

       
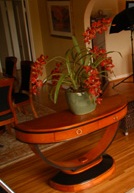
      1) Use.  For elegance, I love to place orchids on a stack of books on a coffee table. I prefer that they 'float' in main rooms so they enhance the furnishings from every angle.  For dining rooms, I use them on sideboards and consoles where they are often reflected in mirrors and flanked by wall lighting; I frequently use them to enhance focal points. In a bathroom, they dress up the empty space in tub surrounds and love the humidity. Placed in front of a mirror, they 'double' in size and add drama to your counter. A potted orchid by the bedside is elegant and sensual. Placing an orchid on a kitchen island or peninsula provides a fabulous visual barrier, often between entertaining and dining spaces. On large bookshelves, small orchids nicely soften the linearity. Needless to say, they are wonderful as centerpieces, particularly large or grouped orchids. 

      2) Care. Orchids require a special potting mix and not soil; the mix will differ with the type of orchid you select (dendrobium, phalaenopsis, cymbidium, etc...). Roots do not need to be covered fully by the mix and actually love extending out from the pot. An orchid will grow only a few leaves per year, but can bloom multiple times if cared for. Orchids don't like wet feet but love moderate humidity. Generally, they should be watered every 5-8 days, or when the mix is completely dry. Water from the top, allowing the water to flow through the pot. Do not leave soil saturated and never leave standing water at the bottom. When in doubt, it's best not to water. The best light is generally indirect and bright; even a low light orchid needs a period of bright West light and won't thrive in the center of a room. I re-pot my orchids once each year, and only increase the size of the pot - generally one with holes on the sides for best aeration - by one inch. Orchids allowed to acclimate to their pots will do better than those 'swimming' in mix in a too-large pot. With just a bit of attention, your orchid plant will bloom regularly for year-round enjoyment in many spaces in your home.

      Jan 11, 2011

      Ten tips to update your home.

      Try these tips for updating quickly and easily:

      Two hours and two cans of paints gave this accent wall a new look.
      1) Paint.  The changes to a room from updating the walls are tremendous. Does that mean you need to do all of the walls...NO.  The addition of one accent wall, freshening up just the trim and doors, adding a faux effect up to chair rail height, can be done in hours.  How about re-painting an old dresser and using it in the entry?

      2) Lighting.  Update the outdated fixtures. (see Blog Jan 8th for detailed information). If the budget allows, change the ones that have the most impact on the room...the dining fixture, a kitchen light...and don't forget that new shades have a big impact.

      Organize shelves for a clutter-free look.


      3) Clean.  Having a clutter-free space does give a sense of newness. Easy ways to reduce clutter are a) store mail and newspapers in wicker baskets or decorative paper boxes, b) organize bookshelves, c) hide unused toys inside inexpensive wicker hampers, d) tuck the items from your home office/dining room into storage containers and stack them on a new shelf for easy access.

      4) Position. Change the layout of your larger room.  Try moving the sofa to a new wall, arranging furniture horizontally versus vertically in the space, and swapping the position of tables and lamps. 

      Adding sconces and a group of prints, was a quick update.

      5) Pillows. Change the color and texture of pillows on the larger furniture pieces. Add a throw or take one away. Can you swap the bedroom pillows and throws with those in the living room? If not, and there is no budget for new ones, try to re-order them, cover the face with a napkin and then tie on ribbon like a gift box.

      6) Hardware.  Replace the hardware on kitchen cabinets and key pieces. Have a knob? Try a pull.  Changing from brass or chrome to a black finish will be dramatic. It's an easy change and you can bargain hunt big box stores for sets of pulls and knobs.


      7) Swap it.  This applies to artwork, accessories, candles and even furniture - if you are ambitious. Moving art on the walls gives new perspective to a room...and of course, the art!  Create a group of accessories rather than spreading them around. Change candles..color and size. If you move furniture, try re-purposing pieces.


      Adding glass & cabinet lighting in uppers was a quick update that transformed this kitchen.
      8) Re-face. Give your appliances and/or cabinets a face-lift. Change the panels on dishwashers and refrigerators (can you reverse what you have?). Use appliance spray paint to re-color. Cut the center of some cabinet doors out and add glass.


      9) Lighten up. Add light to your rooms. Using a mirror, reflect the light from a window to the interior. No window? Place a table lamp or even a picture light in front of the mirror. If you can, add lighting to the perimeter, under cabinets, inside armoires and bookcases... use low wattage LED ropes or strips.


      Adding a plant and a picture dressed up this chest.
      10) Add greens.  Like paint, plants and flowers have a huge impact on rooms.  Soften a hard corner with a tall plant or even curly willow in a large vase. Place fresh flowers on your kitchen counter, a living room table, or other noticeable place.  Hang a seasonal wreath on the wall, from a shelf or on an inside door. Can you use your own garden? Even better.