Mar 30, 2012

Wallcoverings!


Wall coverings have undergone a revolution. Standard wallpaper is a thing of the past. New wall coverings are fresh and exciting.  Those chintzy flower patterns or tiny polka dots from grandma's living room? Gone... In their place are textured papers and big, bold designs in strong colors that can add depth, warmth and more than a little personality to a room.
The patterns are not the only change. These days, wallpaper is easier to put up and take down and it is often used more sparingly than in the past.

Think of it as akin to a piece of artwork or a new throw pillow: an adventurous accessory that can pull a room's elements together and give it some zing. No one is quite sure why the wallpaper trend caught fire. It could be the Mad Men phenomenon - the sudden rush for all things reminiscent of the 1950s and 1960s. More likely, though, it is part of an overall increased interest in home decorating and the effort to find something to distinguish one's home.

Many of the new patterns are designed to pack a graphic punch. Imagine tight geometric shapes in contrasting colors, blown-up damask prints in hot pink or orange, or stark black-and-white trellis designs. Equally popular are textured papers, which may be lined with grass or other natural fibers, beads or raised patterns, and may or may not be printed with a design.The other upside is that wallpaper does not have to cover all four walls of a room. It can be used as an accent - as backing for bookshelves, on a single wall in the bedroom, bathroom or even on the dining room ceiling. It's a great way to customize a space and the wallpaper won't bust the bank.

Some products that I love:

Wallteriors  Custom or ready-made, these hand crafted papers are fabulous.
Philip Jeffries For gorgeous grass cloths, subtle silks, and terrific textured wall coverings, they're the best!


Mar 29, 2012

Using fabrics to update your decor.


Need to change a plain room into one with a bit more color and drama? Add fabric.  The traditional ways are with pillows, to add panel draperies and re-upholster your furniture.  Here are 5 new ways to use fabric - inexpensively - that are easy to do yourself.


1) Frame it.  Love a great print? Buy or make a frame that complements your decor and use the fabric as art. With larger pieces and large scale prints, you can create a triptych as in the image to the right. 


2) Skirt it.  Rather than fully re-covering chairs or adding new padded seats, create a great skirt. Simply staple the fabric to the underside of the seat. You can gather it, make a tailored skirt, or create pleats. Bows are dressy and feminine. With pedestal sinks, you can skirt them for a tailored or dressy look. 


3) Drape it. Update your bed with a fabric drape.  Swag fabric from the ceiling, your bedposts or even a rod and create a stunning bed.  You can update an old window shade with a great square of fabric, add a band at the bottom of old panels, and even swag a new piece over the top of panels to create new ambiance.  The toppers below are a quick tack-up of a textured fabric that adds just the right touch to a cottage style kitchen. How about draping your fabric on a rod on a bedroom or living room wall as a piece of art? Add tassels, trim, or found objects to create a work of art. 


4) Glue it. Hate that old dresser?  Glue fabric to the drawer fronts and even the top for a totally new look. Are your cabinet doors boring? Glue fabric inserts on kitchen cabinets and even on closet doors.


5) Cover it. Have some older lamps? Update them with shades in a fabric that complements your decor. If you are handy, and confident in working with adhesives, cover an accent wall with your fabric. Cover your dated wooden headboard with batting and fabric for a great re-use project that completely changes the look of your room. If your have smaller amounts, cover picture frames with the fabric.

Mar 28, 2012

Should you hire a designer for your project?


The value of using a professional interior designer goes far beyond just aesthetics. When you make a decision to remodel or update your home, and bring in a designer, it WILL change your life in the best ways. 
When asked how I add value for clients, I offer examples that are all provided by clients that I've helped. Bath and kitchen remodels are ideal projects for which calling in a professional will save money and time.  Using my expertise even for a quick consultation results in better space planning,  improved function, ideal product selections, enduring design details, and ideas that make using those rooms far better than a client imagined.  In a remodel, my experience with construction and installation helps guide the process so contractor errors are minimized. Permitting and codes are always changing, and sustainable design can be confusing. That's where the right designer is priceless.


Certainly, designers can provide WOW factor, but also elements that help you many years after the project is complete. When I shored up the bathroom walls during a remodel in a young bachelor's condo, he never dreamed that he'd need to add grab bars. Years later he did while recuperating from a serious injury, and thanked me profusely for saving him from unnecessary construction. We problem solve more than create pretty rooms.


In home updates, I provide the creativity in product selection and space planning that reflect the client's desires.   There is nothing more satisfying when a client calls to tell me how much they love and use their updated spaces. That's especially true for clients who are budget conscious. I know the ways to provide quality at their  price point. When I offer  ideas on re-purposing existing pieces, it saves them money and often keeps a family heirloom in the family.  


Selecting the right finishes, furnishings and accessories, where every piece has a purpose is rewarding for clients. I am a life-style advocate for my clients, providing ideas and recommendations they could not have come up with on their own. Wall colors can be as much of a challenge as using the right tile. For many clients, the right color on their walls is a gift...adding a faux effect or architectural details to make each room flow into the next is priceless. With seven painted swatches on their fireplace wall, my clients had struggled for 2 years to find the right color to work with their existing floor and the new tile they already bought. One glance from me and a name-dropped color later, she painted her wall that night and was ecstatic over the result. 
When you want to LOVE your home, have a budget, and want a style that is YOU, the decision to hire a designer is always right.  Doing it right saves time and saves money.  We can help you can nail your budget, and accomplish something you will appreciate every day.   


A dramatic before and after.

Mar 27, 2012

5 tips for selecting artwork for your home.


I am frequently called up-on to help clients who have art and photography collections.  They are concerned that their collection doesn't "fit" their style and want help with placement and sorting through what they have.  Matching art to the decor is certainly possible but not desirable or even realistic. I prefer working with elements from the art and allowing it to flow in each space. Art can either stand alone or be incorporated 
into a space.  When updating a room,  I often use a collection of art and photography as inspiration to select the style, colors, and scale of pieces to be used.   For those of you who like to follow guidelines, here are a few  that might help in selecting art and decor:
1)  Take cues from the art to being into the room. A monochromatic piece may invite subtle decor with muted colors and a calming influence. When you keep the colors in the room and the art in similar hues, the overall feel is elegant (see left). I have seen the difference between rooms devoid of similar colors and those whose accents mirror what is in the art. Spaces with colors that repeat in the room feel cohesive and actually draw attention to the art. If your art is what you love, make it the focal point of a room and everything else should be kept monochromatic, simple in line and subtle in detail.


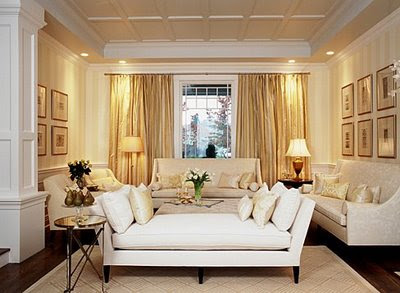
2) Combine similar styles of art in the same space. That may mean that  the composition is similar - all landscapes or all abstract art - and keep pieces by the same artist together. As in the living room above, the transitional furnishings are reflected in simple lines in the architectural prints. Framing them all the same keeps the focus on the art rather than a decorative frame.
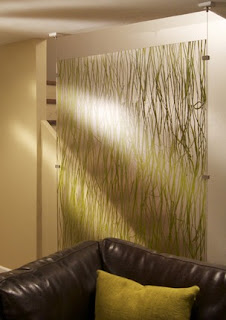
3) Highlight your art with lighting. That doesn't mean throwing an eyeball fixture onto each piece. Consider ambient light from skylights (as in the image to the right), interesting ways to use accent lighting like LED ropes embedded in  molding, dropped lights to feature a specific work, and back-lighting around a frame or canvas.
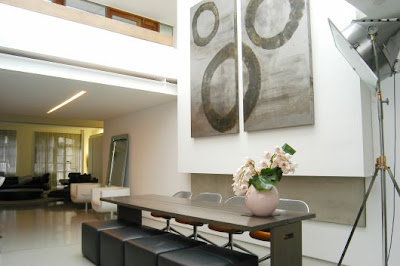
4) Repeat line and shape in the art and the room. If your art has bold sweeping curves, consider using it in a space with curved tables, sofas, and area rugs.  Marry styles. If you have bold, modern art, consider using pieces in the same style in your decor.
5) Place furniture auspiciously to highlight art. Use
 tables, benches, seating groups and other pieces 
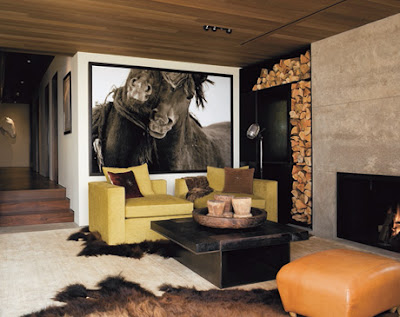
to create a vignette as in this framed black and white photo behind a vibrant yellow sofa. The goal is to have the art and furniture complement 
one other. Don't hesitate to use the architecture of the room to guide you; if you have niches, vaulted ceilings, large wall expanses, and unusual window or wall details, work them into your space plan and then use that plan to position your artwork.


Mar 26, 2012

COLOR IT YOURS - Purple!


What’s not to like about purple? It's a real 'shape shifter' of a color. It effortlessly goes from regal as in the living room below with 6839 Kimono Violet, to relaxed in a dining room with 6549 Ash Violet, to energetic in a teen bedroom painted with 6830 Kismet. Depending on the context in which it's used, and the complementing colors you add, purple is a great color for meditation, magic and mystery, as well as royalty. The combination of red and blue - the warmest and coolest colors - purple is believed to be the ideal color.  The millions of hues can be subtle, bold or just right.  Purple hues "play well with others", complementing everything from subdued hues like brown and gray to vivid pops of more vibrant color. Check out the color hues by family at Sherwin Williams. 


SW6839 Kimono Violet  
SW6549 Ash Violet 


SW6830 Kismet 


Mar 23, 2012

Small hardware, big impact.


One of the easiest ways to update your home is to change the hardware. From a simple knob or a decorative pull, you can transform a kitchen. If your doors look dated, remove the knobs and install lever handles.  To make a design statement add some unusual or themed hardware. When you need to update a dresser, especially to re-purpose it for another room, new pulls can change it's look from drab to dynamic.  Many of us have built-in butler's pantry doors and drawers and hallway linen closets;  The brass or painted wooden knobs are dated and boring.  Look for interesting hardware with a unique shape, color or finish.  Generally, an update with big box store hardware can be accomplished for under $200 and the transformation is priceless. For an elegant and custom look, check out these pulls and knobs.  All of these unique hardware pieces are available in-store at A Touch of Tradition.


Mar 22, 2012

How to add "green" to your kitchen.


Did you know that your kitchen is one of the biggest resource hogs in your house. You use electricity and gas for your appliances. You use water in your sink and dish washer. Your fridge is stocked with foods grown and transported from all over the world that require chemicals, water and fuel to be produced and transported. And then there's the non-recyclable packaging that goes straight to a landfill. Here is a list of things you can do  to lower your environmental impact and live in a healthier home. 
1. Use energy-saving appliances. Reduce your power and water usage and your greenhouse gas production by using Energy Star appliances. They save as much as 50% of your energy and water use, and can cut your carbon footprint by 1000+ pounds, compared to standard appliances. Replace one at a time unless you're doing a remodel.  Many utility companies give rebates for old refrigerators.
2. Use energy efficient lighting. Compact fluorescent lights use 1/4 the energy and last up to 10 times as long as standard bulbs. And they come in versions that are dimmable and work with any light type you can think of. Each incandescent bulb you replace will save up to $10 and 100 pounds of carbon dioxide per year and last far longer, reducing your maintenance costs. Long-term, LED may be a better option. See prior blogs on the details for selecting LED's. 
3. Recycle and Re-use. Can you rinse that ziplock and use it again? Can you reuse the containers you got from take-out? Let the checker know you don't want a plastic bag for groceries. Bring a tote, some reusable sack, or those bags you still have!  Try a stainless water bottle and filter pitcher so you don't have so many plastic bottles.  I love glass containers since they store and wash beautifully. Plastic wrap is OUT of my kitchen.
4. Eat Organic, Eat Local. Not only is eating organic healthy for you and your family, but it keeps chemicals from running off into our oceans and rivers from non-organic farms. The cost today is nearly the same as non-organic but the benefits to you and to the earth are significantly more.  Eating food sourced locally means tons of carbon dioxide are not released into the atmosphere in the process of transporting food to you.  You can find a farmer's market near you to get delicious, organic, locally-grown foods!
5. Get green cleaners. Each time you spray a standard cleaner on your counter you breathe in a fine mist of harmful chemicals. Use non-toxic, organic dish soap, detergent and cleaners to protect yourself and your family. Read the labels, buy in bulk to make refills easy, and consider making your own!
6. Compost. Don't throw out those coffee grounds and banana peels-- save landfill space and make your own rich potting soil using a composter. It's easy! And there's even a model that works right in your kitchen.  We like Amazon.com since they have selections from many manufacturers and the prices are reasonable.
7. Only run your dishwasher when you have a full load. It takes the same amount of energy to run a full or a half load-- so wait another day and fill up that machine. Also, remember that washing dishes or pots by hand takes more water than doing them in the washer-- so go ahead and put them in the machine.  When you're loading don't run the water to rinse!

Making small spaces multi-functional.


When I got out of college and was in graduate school and working, I lived in a small studio apartment in Manhattan. It needed to serve as my bedroom, library, dining room and a place to entertain.  It's easy update a single room - on a budget - and better to have someone handy to help.  My Dad was invaluable in helping me design and build some unique dividers and dual use pieces. Here are some updated ideas for space planning and decorating that you can try.


Create a movable wall.  Do you have a dresser? A headboard? A bookcase? In a single room apartment, they can serve as a room divider. Even your dining table can separate the kitchen from the bedroom; try a bench seat on one side and chairs on the other. Second-hand windows, doors and shutters, hinged together make great folding screens depending upon your style. For the do-it-yourself expert, build a divider from shelves, blocking off some of the openings for more privacy. If a wall is more your style, build one that can be removed, inserting tempered glass or plexiglass to keep light moving through. To separate my kitchenette from the rest of the space I had my dad build a tall cabinet then adding an upper cabinet and bar height table that attached to the wall. It kept the space open, gave me a table and a desk and plenty of great storage. If you own your apartment, invest in room dividers that nest into the walls when not in use or revolve storage and the TV from one side to the other.


Let the light in.  Privacy is key in a big city, but small spaces NEED light.  A transparent or open-weave room divider can keep your bedroom or guest sleeping area private from the public space.  Leaving windows un-dressed (no drapes or hard treatments) using window film is another option. For simplicity use frosted effect films, or for drama use patterns and textures. Add light inside cabinets, shelves, under moldings, surrounding art, and under or behind large pieces of furniture: LED strips and ropes provide light without producing heat or using much energy.  If you can, remove the doors in hallways to let the light shine through the space.


Uniformity is best.  To make small spaces seem larger, unifying the color scheme is best. Monochromatic color schemes in neutral colors will help make walls and floors seem larger. Accent the space with colorful artwork and large scale accessories. If you have many collectibles, group them in one area to keep the space looking open.


Store it.  Having a clutter-free space is attractive as well as provides peace of mind.  For that dual-duty kitchen table/desk, find some great wicker or paper boxes with lids and store your papers and office supplies.  Have an extra closet?  Turn it into a home office so you can close the door on your work. You can update a bookcase with ready made or DIY doors so you can close off messy shelves. Don't forget under-bed storage and benches or ottomans that tuck everything from seasonal clothes to extra blankets and pillows inside. If you have the depth, turn your walls into bookshelves, storage cabinets and even a space for your TV.


Mar 21, 2012

Need a pillow? Try these 10 tips.


Pillows are a wonderful accessory. They're generally inexpensive, easy to find and provide color, texture, and style to any room. They dress up your bed, make a lounge chair more comfortable, and create a headrest for the sofa. You can sew your own, use an iron on tape to seam fabrics, and dress them up with trim, appliques and other items to change them over time. Some ideas...

1) DON'T use too many. Sitting on furniture overstuffed with pillows
isn't comfortable and they often end up on the floor. 
For a standard 8' sofa 3 to 4 pillows should be sufficient.


2) DO consider changing the shape and color of the pillows from that of your base sofa cushion and fabric color. Have many pillows that came with your sofa? Add another fabric to the face of some, and add welting, trim and other details for interest.


4) Square pillows work for many applications. For example, 16" squares are good corner pillows for 6-7' sofas and 18" squares work for 8' or larger sofas. 26" x 26" is a good size for floor pillows and back pillows for queen and king sized beds.  

5) Try neck roll pillows. These are long and round - generally 8" in diameter and 16" long for lounge chairs. Bolsters in larger scale 10"in diameter and 22" wide, are great for beds. Scale the width for the chair.


6) Kidney pillows dress up large dining chairs and the center of sofas. The chair pillow should sit just inside the width of the seat and be as high as needed for comfort when sitting in the furniture. This lounge chair has a back pillow with a kidney pillow in front for a very petite client.


7) Add detail with contrast welting, a band with a second fabric, and appliques. How about corner or center buttons?

One decorative pillow has more impact than 3 plain ones.


8) Knife-edge pillows are fine but try adding flanges and welting. 


9) Experiment with mixing round and square shapes together. On large sofas I like to use square corner pillows with a smaller round in front. If the sofa is really long, a large bolster in the center is nice and also serves as a back support.

10) Swap the color, texture and location of pillows throughout the year for interest! Bedrooms aren't often in the same color as the living areas, but if they are, swap room to room. 

Mar 20, 2012

5 DIY projects for rainy March weekends.


When you  need to perk up your home but want to stay on a budget, try one of these great project ideas.  Often, you have items that you can use in garages, basements, attics and even spare rooms, or you can purchase used items at garage sales and thrift shop, often for $10 or less.  Paint and supplies are easy to obtain.  If you don't feel confident with tools, hardware stores will often help.


1) With flat screen televisions under $100, your old TV cabinet may be an eyesore or unused.  A bit of paint, some new hardware, and a new shelf, transformed this one into a cottage curio that is a new focal point. Two-toned pieces work well but don't make them too trendy unless you love to re-finish. Covering grainy wood is best started by applying a heavy duty primer coat and sanding before and between the color coats. 


2) My mother-in-law gave my husband this same table. Since I don't have a retro style home, it was an eyesore for me,  A two color paint finish, accessorized to match, and the table becomes a perfect decorative element. Handy with appliques? Use scrap wallpaper to cover one of the surfaces for a smooth but colorful finish.


3) Most of us have old bookcases. For a long time, I used the old oak one from post-college days in the garage. Even an IKEA piece can be transformed.  This one was painted and hand-made doors were fashioned from 1 x 4 lumber. Cutting lumber to size is where a hardware store can help. 


4) Updating a dresser is one of the simplest pieces to re-do.  This one was painted, stenciled and the top drawers were replaced with baskets in the colors of the stencil.  Adding bun feet and painting the old hardware completed the transformation.  If you want a feminine look from a boxy piece,do add feet, try a glass pull or knob, and even consider a wooden applique for large doors and drawers. To make a fussy piece more modern, remove embellishments and consider applying mirrors on the face.


5) This home office or craft center can be created in any size closet that you can feel comfortable sitting in.  Here, the rod and shelf were removed, Ben Moore 879 White Opulence was painted on the back wall, and three shelves, painted in Decorators White, were installed.The chair was repurposed from a salvage shop and painted the same as the shelves. A lip was added to the lowest shelf to create a counter ledge. Removing the sliding door and replacing with bi-fold doors made the entire width of the closet accessible. The chair tucks under the new desk when the office is closed!

Mar 19, 2012

5 favorites so you can start creating your outdoor room.


When you set your outdoor spaces up with a floor covering, good lighting, and of course, furniture, you truly get an extension of your home. As we enter Spring, it's a good idea to think about outdoor living now so you can enjoy warm weekends and balmy evenings before the heat of summer is upon you.  Here are some of my classic outdoor favorites that will endure many seasons and be stylish for years to come.


1) Flooring.  I love to add outdoor rugs or other coverings, especially when you don't have a defined porch or patio. It separates the furniture from the landscape and creates wonderful ambiance.  Using a geometric rug is my preference, so you don't compete with natural elements yet retain the sense of outdoors. This one is from my shop and is available in several sizes and colors.


2) Lighting. An essential part of an outdoor room is its lighting. Whether you're having a dinner party or just conversation, good lighting makes spaces more pleasant. If you don't have receptacles to plug in string lights, which are the easiest type of portable lighting for outdoors, candles and LED candles are great. This lantern, from Crate & Barrel, is eco-friendly and has fabulous texture and clean lines. Take a look at the LED candles that you can turn on at 6, run for 5-6 hours, and they go off and cycle on again every day at the same time. 


3) Planters. If your outdoor space is a patio, balcony or other space without greenery, it's really nice to add plants.  The right planter is key to maintaining the plant through summer and beyond, but also adds character and style.  My personal favorites are ceramic urns and vases with texture and unique scale. You can plant a tree, grow a vine (using a trellis) or simply plop in a plant. Take a look at the copper and ceramic planters and the trellis collection @ A Touch of Tradition.  


4) Seating. I don't believe that all matching furniture outdoors is essential, and mix teak with iron and wicker all the time. Purchasing pieces that will LAST is the right way to go. Teak is one of my all-time favorites and looks great whether it's oiled and brown or aged and gray; it depends on the locale and the style you're after. My teak pieces are plantation grown and will last for decades.


5) Pillows & Cushions. Another one of the essentials for outdoor living are the cushions and pillows you use. I recommend geometric patterns so that your outdoor spaces don't compete with nature, but apartment balconies overlooking steel and concrete often need floral fabrics. Using Sunbrella or other UV and weather resistant fabric that lasts more than one season is smart.